Exercise
Wall Push-Up Form: Beginner Wall Push Ups, Steps and Mistakes
Learn wall push-up form for beginners: wall distance, hand height, body line, shoulder control, common mistakes, easier progressions, and stop signals.
Learn the move
Setup In 3 Steps
Face a wall, place both hands on the wall around chest height, step the feet back a short distance, and keep a straight line from shoulders through hips to heels. Bend the elbows to bring the chest toward the wall, press back without shrugging the shoulders, and stop the set when the body line, hand pressure, or breathing changes.
- Clear the floor path and choose the easiest version before adding speed or load.
- Do the first two reps slowly enough that you can pause and check this cue: Move the whole body as one line toward the wall, then press the wall away while the shoulders stay down and the elbows track comfortably beside the body.
- Practice for 2 minutes with Wall Push-Up + Foot distance check. Find the closest foot position where hands, shoulders, hips, and heels can stay lined up.
Clear the floor path and choose the easiest version before adding speed or load.
A clean wall push-up ends with the same foot position, hand pressure, body line, and breathing pattern it started with. If the hips sag, the neck cranes, or the shoulders jump toward the ears, shorten the distance.
Standing too far from the wall and turning the first rep into a shoulder or low-back struggle.
Wall Push-Up + Foot distance check. Find the closest foot position where hands, shoulders, hips, and heels can stay lined up.
Wall Push-Up + Slow press. Try two slow reps and stop before the body line or shoulder position changes.
Repeat + Move to incline + Stay at wall. Repeat the wall version when it is still useful; use the incline counter push-up only when the same line stays visible.
Use It Today
Start with 2 sets of 6 slow reps or 20 seconds of controlled practice. Then pair it with Wall Push-Up + Slow press for 3 minutes if the cue stays clean.
Adjust The Session
Decision guide
Use This Page When It Fits Today
Wall Push-Up Form: Beginner Wall Push Ups, Steps and Mistakes fits a reader who wants one clean movement cue before placing the exercise inside a complete home workout.
Practice two slow reps, then check whether the page cue still holds: Move the whole body as one line toward the wall, then press the wall away while the shoulders stay down and the elbows track comfortably beside the body.
Skip this exercise today if the room, support surface, or equipment setup makes the first two reps feel unstable.
Open 20-Minute Beginner Bodyweight Strength when the cue is clear enough to repeat under light fatigue.
Practical brief
Use This Page In Practice
Wall Push-Up Form: Beginner Wall Push Ups, Steps and Mistakes fits a reader who wants one clean movement cue before placing the exercise inside a complete home workout.
Face a wall, place both hands on the wall around chest height, step the feet back a short distance, and keep a straight line from shoulders through hips to heels. Bend the elbows to bring the chest toward the wall, press back without shrugging the shoulders, and stop the set when the body line, hand pressure, or breathing changes. Practice two slow reps, then keep this cue visible: Move the whole body as one line toward the wall, then press the wall away while the shoulders stay down and the elbows track comfortably beside the body.
Standing too far from the wall and turning the first rep into a shoulder or low-back struggle. Placing the hands so high that the shoulders shrug toward the ears. Letting the hips trail behind the chest instead of moving the body as one line.
Stand closer to the wall and use a smaller elbow bend. Pause after each rep and reset the shoulder position before continuing. Progress by stepping a little farther from the wall or using a slightly lower stable surface, but change only one variable at a time and return to the wall when the body line is less repeatable.
Place wall push-ups inside a full beginner session after the first two reps stay controlled.
20-Minute Beginner Bodyweight StrengthWall Push-Up Form: Beginner Wall Push Ups, Steps and Mistakes fails today when the first two reps need extra floor room, support, or gear adjustment before the cue can be repeated.
20-Minute Beginner Bodyweight StrengthUse Hip Hinge Drill when Wall Push-Up Form: Beginner Wall Push Ups, Steps and Mistakes almost fits but the next constraint needs a different route before training starts.
Hip Hinge DrillBest For
Learn how to set up a wall push-up, choose wall distance and hand height, check the first reps, and know when to use an incline push-up instead.
Before You Start
Choose a solid wall, dry floor, and clear foot path. Use flat shoes or bare feet with traction, and start close enough to the wall that the first two reps feel controlled.
Real-world check
Field Notes
Write the version of Wall Push-Up Form: Beginner Wall Push Ups, Steps and Mistakes that stayed clean, the cue that helped, and which workout link should contain it.
Wall Push-Up Form: Beginner Wall Push Ups, Steps and Mistakes belongs in the session when the reader can practice the setup slowly enough to keep the main cue visible.
Start with Wall Push-Up in short practice sets, then use Wall Push-Up only if the first cue stays steady.
If the movement feels unclear, do not add reps; use this simpler version first: Stand closer to the wall and use a smaller elbow bend.
Stop the set when this mistake shows up: Standing too far from the wall and turning the first rep into a shoulder or low-back struggle. The cleaner choice is a shorter practice round.
After You Finish
Repeat the same version when the main cue is still hard to keep for every rep.
Progress by stepping a little farther from the wall or using a slightly lower stable surface, but change only one variable at a time and return to the wall when the body line is less repeatable.
Swap exercises when the setup keeps breaking the main cue. Pause after each rep and reset the shoulder position before continuing.
Log one line: A beginner starts close to the wall, notices the shoulders shrug when the feet move farther back, returns to the closer setup, and uses the incline counter page only after the wall reps stay smooth.
Wall distance and hand height
Set hands around chest height and shoulder width. Step the feet back a little, not as far as possible; the right distance is the one where the body stays in one line without the hips drifting or the shoulders shrugging.
Clean rep check
A clean wall push-up ends with the same foot position, hand pressure, body line, and breathing pattern it started with. If the hips sag, the neck cranes, or the shoulders jump toward the ears, shorten the distance.
Common wall push-up mistakes
The usual mistakes are stepping too far from the wall, placing hands too high, letting the hips arrive after the chest, shrugging into the neck, and bouncing off the wall instead of pressing smoothly.
Make it easier
Stand closer to the wall, use a smaller elbow bend, or pause after each rep. Keep the wall version until the first two reps and the last two reps look the same.
When to try an incline push-up
Move to a stable counter or bench only after the wall push-up feels repeatable at a controlled distance. If the lower surface changes the body line or shoulder comfort, return to the wall.
When to end the set
End the set when hand pressure becomes uneven, feet slide, shoulders shrug, the body line changes, or breathing no longer stays calm. Stop the activity for chest pressure, dizziness, unusual shortness of breath, confusion, or a fast or uneven heartbeat.
What this page does not do
This page teaches a general pressing movement for adults. It does not assess pain, explain a shoulder problem, provide rehabilitation, or choose a personal training plan.
Real home scenario
Wall Push-Up Form: Beginner Wall Push Ups, Steps and Mistakes scenario: A reader is standing in a small room before a workout and is unsure whether wall push-up form: beginner wall push ups, steps and mistakes will stay controlled. The page is useful if two slow practice reps make the cue clearer before the timer starts.
Best first version
Wall Push-Up Form: Beginner Wall Push Ups, Steps and Mistakes should start with the easiest version that still matches the page promise. If setup takes longer than the first work block, reduce equipment, range, or duration before changing the whole plan.
What this page helps you choose
Wall Push-Up Form: Beginner Wall Push Ups, Steps and Mistakes helps you see whether the current home constraint is realistic today. It should make the next action smaller: start the first block, practice the first movement, repeat the first week, or switch to a more realistic related page.
How to make it easier
Wall Push-Up Form: Beginner Wall Push Ups, Steps and Mistakes gets easier by changing one lever first: shorter time, smaller range, lower impact, lighter equipment, or more rest. Changing one lever keeps the result readable and makes the next repeat easier to judge.
Next-page logic
Wall Push-Up Form: Beginner Wall Push Ups, Steps and Mistakes next step: Place hands on the wall at chest height, step the feet back only as far as the body line stays steady, try two slow reps, then move to the incline counter push-up only when the wall version feels repeatable. The related links point to the next practical choice, so the next click moves from choice to action without opening several unrelated pages.
Compare before switching
Wall Push-Up Form: Beginner Wall Push Ups, Steps and Mistakes vs 20-Minute Beginner Bodyweight Strength
Wall Push-Up Form: Beginner Wall Push Ups, Steps and Mistakes fits a reader who wants one clean movement cue before placing the exercise inside a complete home workout.
Choose 20-Minute Beginner Bodyweight Strength when the reader needs a narrower, easier, quieter, or more specific next step before returning to Wall Push-Up Form: Beginner Wall Push Ups, Steps and Mistakes.
20-Minute Beginner Bodyweight StrengthWall Push-Up Form: Beginner Wall Push Ups, Steps and Mistakes is better when the reader wants the full decision on this page, including setup, pacing, next step, and the reason it fits today.
Reader questions
FAQ
The easiest version of Wall Push-Up Form: Beginner Wall Push Ups, Steps and Mistakes is the one where the main cue stays visible for every rep: Move the whole body as one line toward the wall, then press the wall away while the shoulders stay down and the elbows track comfortably beside the body. Shorten the range, slow the tempo, or use support before adding more reps.
Avoid rushing the setup before the first two reps. If the room, surface, or equipment is not steady, the page is no longer helping and a simpler movement is the better choice.
20-Minute Beginner Bodyweight Strength is the best next page when Wall Push-Up Form: Beginner Wall Push Ups, Steps and Mistakes feels controlled enough to use inside a timed session.
Skip Wall Push-Up Form: Beginner Wall Push Ups, Steps and Mistakes when the first two reps make the cue disappear or when the space is too crowded to repeat the movement without adjusting mid-set.
Source And Safety Notes
What the source informs: Wall Push-Up Form: Beginner Wall Push Ups, Steps and Mistakes uses ACE Exercise Library for movement setup and cue limits, especially the difference between a practice rep and a loaded workout set.
How this page uses that: Wall Push-Up Form: Beginner Wall Push Ups, Steps and Mistakes is where HomeFit Atlas sets the home-use cue, Wall Push-Up Form: Beginner Wall Push Ups, Steps and Mistakes succeeds when two slow practice reps keep this cue visible: Move the whole body as one line toward the wall, then press the wall away while the shoulders stay down and the elbows track comfortably beside the body., the skip condition, and the better next page 20-Minute Beginner Bodyweight Strength.
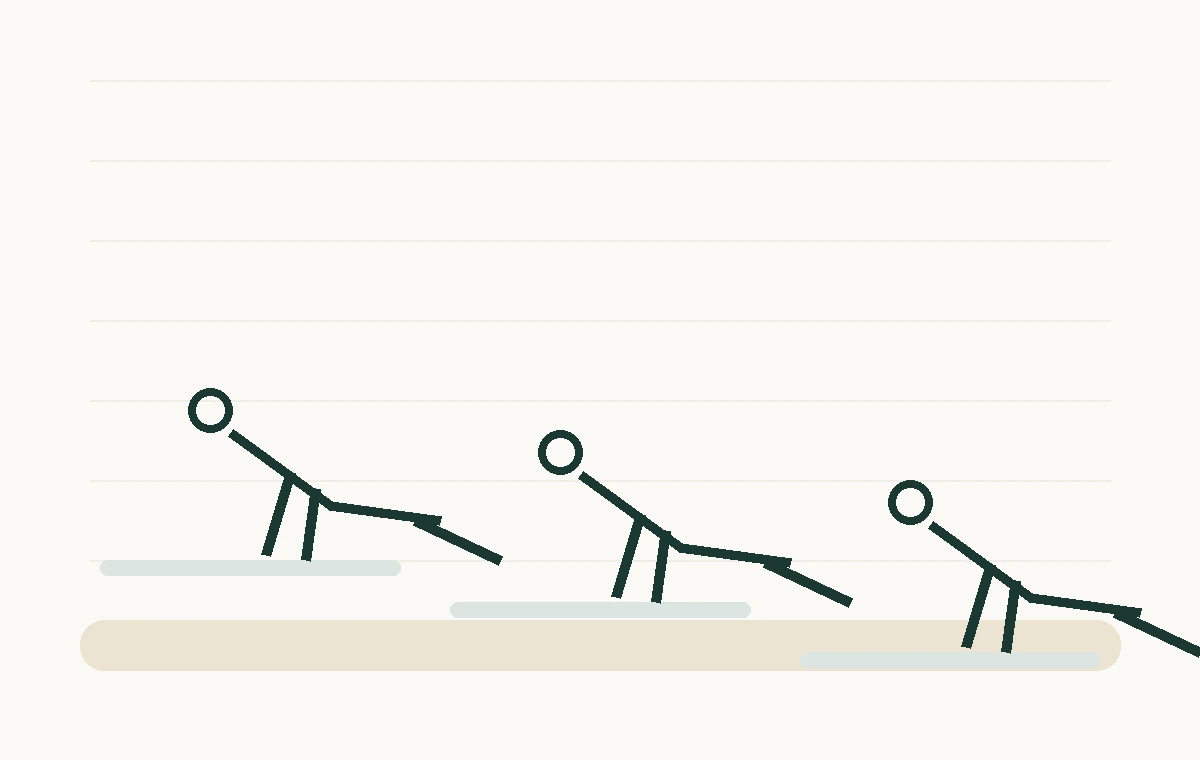
Image fit: close. The original line art shows supported push-up body lines; this page supplies the wall-distance and hand-height checks that the image cannot fully show.
General adult education only. Stop if pressing feels sharp, unusual, unstable, or unsafe, or if chest pressure, dizziness, unusual shortness of breath, confusion, or a fast or uneven heartbeat appears. Ask a qualified professional when personal health, pain, balance, or medical history changes the choice.